

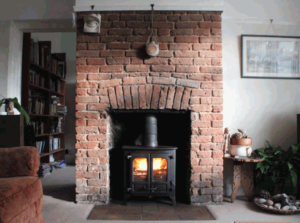
Cleaning fireplace brick is an essential task to maintain the appearance and functionality of your fireplace.
In this article, we will discuss the importance of cleaning fireplace brick, the tools you need for the job, and a step-by-step guide on how to clean fireplace brick effectively.
From preparing the area to rinsing and drying the brick, we will cover all the necessary steps to ensure your fireplace looks its best.
We will provide some extra tips to make the cleaning process even easier. Let’s get started!
Explore in-depth: How To Vacuum Carpet Like A Professional
Why Is It Important To Clean Fireplace Brick?
Cleaning the fireplace brick is essential to prevent creosote buildup, which can lead to dangerous chimney fires, and it also ensures the longevity of your bricks and the overall efficiency of your fireplace.
Regularly cleaning the fireplace brick not only safeguards your home from potential chimney fires caused by creosote accumulation but also plays a crucial role in maintaining the structural integrity of your fireplace. Michelle Driscoll, MPH from Mulberry Maids in Colorado emphasizes the importance of thorough cleaning to remove any soot or debris that could pose a fire hazard. Taking safety precautions, such as using proper ventilation and protective gear, is vital when undertaking this task.
What Tools Do You Need To Clean Fireplace Brick?
To effectively clean your fireplace brick, you’ll need a variety of cleaning products and tools, including rubber gloves, safety goggles, a scrub brush, and common household items like vinegar, dish soap, and baking soda.
Protective Gear
Wearing protective gear such as rubber gloves and safety goggles is crucial to protect yourself from harmful cleaning chemicals and debris during the cleaning process.
When handling harsh chemicals, not wearing proper protective gear can result in skin irritations, burns, or even long-term health issues. For instance, exposure to ammonia or bleach without rubber gloves can lead to skin damage, while inhaling fumes from these chemicals without safety goggles can cause respiratory problems. Working with sharp objects without gloves can increase the risk of cuts or puncture wounds, which can be prevented by wearing the right protective gear.

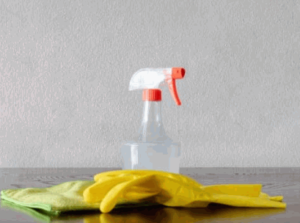
Cleaning Solution
A good cleaning solution, often made from a mixture of vinegar, dish soap, and water, is vital for effectively removing soot and other residues from fireplace bricks.
While natural solutions like vinegar and dish soap are effective at breaking down dirt and grime, commercial products containing TSP and ammonia often provide a stronger chemical reaction to tackle tough stains.
Vinegar is known for its acidic properties which help dissolve mineral deposits and grease, while dish soap acts as a surfactant to lift dirt.
On the other hand, TSP (trisodium phosphate) is a powerful cleaner commonly found in heavy-duty degreasers and can cut through layers of grime effortlessly.
Ammonia, another common ingredient in commercial cleaners, is highly effective at cutting through grease and disinfecting surfaces.
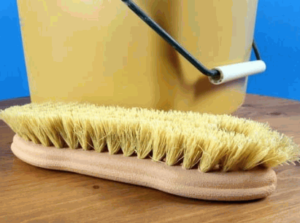
Soft-Bristled Brush
Using a soft-bristled brush is important to avoid damaging the bricks while still effectively removing soot stains and other residues.
Regarding brushes for cleaning fireplace bricks, there are several options available.
- Avoid using wire brushes or stiff-bristled brushes, as they can cause scratches or damage to the bricks.
- Consider using a natural bristle brush or a scrub brush with nylon bristles for a gentle yet effective cleaning process.
Choosing the right brush depends on the level of soot buildup and the type of bricks in your fireplace.
When scrubbing the bricks, start by applying a mild soap solution or a specialized brick cleaner. Use the soft-bristled brush in small, circular motions to lift the soot stains gently. It’s important to work slowly and methodically, focusing on one section at a time.
After scrubbing, rinse the bricks with clean water and allow them to dry completely before using the fireplace again. Regular maintenance using the correct brush and technique can help keep your fireplace looking clean and well-maintained.
Sponge Or Cloth
A sponge or cloth is essential for rinsing and wiping down the bricks after applying the cleaning solution, ensuring no residues are left behind.
Once the cleaning solution has been applied, the sponge or cloth plays a crucial role in the final stages of the cleaning process. These tools help to physically remove any loosened dirt, grime, or stains from the surface of the bricks. The gentle yet effective action of the sponge or cloth ensures that the bricks are thoroughly cleaned without causing any damage.
Rinsing is a critical step after using the cleaning solution to prevent any residue from remaining on the bricks. Thorough rinsing with clean water helps to wash away any lingering cleaning chemicals, preventing the formation of streaks or discoloration on the bricks.

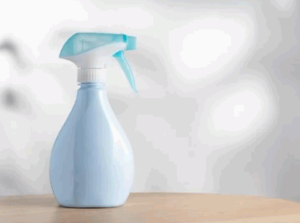
Bucket Or Spray Bottle
Using a bucket or spray bottle to hold and apply the cleaning solution can make the cleaning process more efficient and manageable.
When opting for a bucket, allows for larger volumes of cleaning solution to be prepared at once, reducing the need for frequent refills. This is especially useful for cleaning larger surface areas or outdoor spaces.
On the other hand, a spray bottle provides more precision and control over where the solution is applied, making it ideal for targeting specific spots or hard-to-reach areas.
To ensure an even application with a bucket, use a mop or sponge to distribute the solution evenly. With a spray bottle, make sure to maintain a consistent distance from the surface and use steady, overlapping strokes to prevent streaks and ensure comprehensive coverage.
How To Clean Fireplace Brick: Step-By-Step Guide
Cleaning fireplace brick requires a methodical approach to ensure all soot and creosote buildup is effectively removed, while also taking appropriate safety precautions.
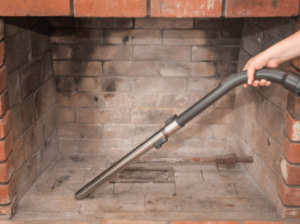
Step 1: Prepare The Area
Before you start cleaning, prepare the area by removing any loose debris and covering surrounding furniture and flooring to protect them from splashes of cleaning products.
Next, ensure proper ventilation by opening windows or using fans to avoid inhaling strong fumes. Consider wearing protective gloves to shield your skin from harsh chemicals, and a mask to protect your respiratory system. Use eye protection such as goggles to prevent any splashes or irritation. Remember to read the labels of cleaning products carefully and follow the instructions to prevent accidents or misuse.
Step 2: Mix The Cleaning Solution
To mix the cleaning solution, combine equal parts of vinegar and water with a few drops of dish soap in a bucket or spray bottle.
If you prefer a stronger cleaning solution, you can replace the vinegar with a mixture of Trisodium Phosphate (TSP) and water. TSP is known for its powerful cleaning properties, making it ideal for tackling stubborn stains and grease buildup. Simply mix one tablespoon of TSP with one gallon of water to create an effective cleaning solution.

Step 3: Test The Cleaning Solution
Before applying the cleaning solution to the entire fireplace, test it on a small, inconspicuous area of the bricks to ensure it does not cause any damage or discoloration.
Testing the cleaning solution on a small area first is crucial as it allows you to spot any adverse reactions before potentially ruining the entire surface. Start by selecting a hidden spot or a corner, applying a small amount of the solution, and observing it carefully for a few minutes. Look for any changes in the color, texture, or integrity of the bricks. This method helps you gauge the compatibility of the solution with the material and prevents any irreversible harm to the fireplace. It’s a simple yet effective way to safeguard your surfaces from unintended harm.
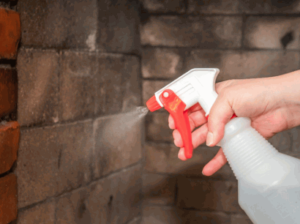
Step 4: Apply The Cleaning Solution
Apply the cleaning solution generously to the fireplace bricks using a sponge or scrub brush, allowing it to sit for a few minutes to break down the soot and grime.
Ensuring even coverage is essential when applying the solution to the bricks. Make sure to spread it out evenly, paying special attention to any heavily soiled areas. This will help the solution penetrate effectively and work its magic on the stubborn stains.
Letting the solution sit is a crucial step in the cleaning process. Allowing it time to work on the dirt and grime will make scrubbing much easier and more effective. Patience is key here; the longer you let it sit, the better the results.
If you’re dealing with particularly tough stains, try using a gentle circular motion when applying the solution. This can help to agitate the grime and assist the cleaning solution in breaking it down.
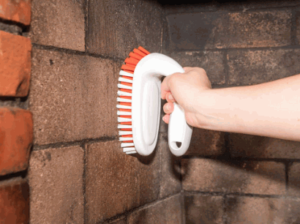
Step 5: Scrub The Brick
After the cleaning solution has been set, scrub the bricks vigorously with a scrub brush to remove soot stains and creosote buildup.
When scrubbing the bricks, it is crucial to apply consistent pressure to effectively lift off the stubborn stains. Use circular or back-and-forth motions to cover the entire surface evenly, ensuring that no area is left untouched. Paying attention to corners and edges where buildup tends to accumulate is essential for a thorough cleaning. Consider dividing the area into manageable sections to work on, maintaining a systematic approach for a more efficient scrubbing process. Remember, the key is to be thorough yet gentle to avoid damaging the bricks during this cleaning process.
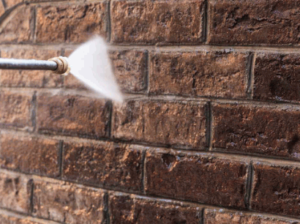
Step 6: Rinse The Brick
Once the scrubbing is complete, rinse the bricks with clean water using a sponge to remove any remaining cleaning solution and debris.
Proper rinsing of the bricks is crucial in maintaining their integrity and appearance over time. Thorough rinsing ensures that no residue of the cleaning solution is left behind, which could lead to discoloration or damage. Removing all debris during rinsing helps prevent any buildup that could affect the durability of the bricks.
Take your time while rinsing, making sure to cover all surface areas to achieve a clean and polished finish. Remember, a meticulous rinse is the key to preserving the beauty and longevity of your bricks.
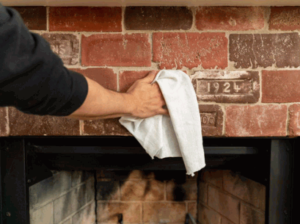
Step 7: Dry The Brick
Dry the fireplace bricks thoroughly using a clean cloth or allow them to air dry completely before using the fireplace again.
It is crucial to ensure that the bricks are entirely moisture-free to prevent any potential hazards.
An effective method is to lay the bricks out in a single layer and rotate them periodically to expedite the drying process.
Properly dried bricks will enhance the overall performance and longevity of your fireplace, minimizing the risk of cracking or damage.
Additional Tips For Cleaning Fireplace Brick
Along with the basic cleaning steps, consider using mild dish soap for light cleaning, or applying a paste made from baking soda for tougher stains.
For a more thorough clean, mix equal parts of white vinegar and water in a spray bottle and spritz the bricks. Let it sit for a few minutes before scrubbing it with a stiff brush. You can also use a commercial brick cleaner following the manufacturer’s instructions. To prevent future soot and ash buildup, regularly remove ashes from the fireplace and inspect the chimney for blockages. Remember to wear protective gear like gloves and goggles when cleaning to avoid skin irritation or eye problems.
Conclusion
Cleaning fireplace bricks is a crucial task that not only maintains the aesthetic appeal of your fireplace but also ensures safety by preventing creosote buildup and potential chimney fires.
Regularly cleaning your fireplace bricks not only enhances the overall look of your living space but also plays a significant role in maintaining the efficiency of your fireplace. By removing soot, debris, and creosote buildup, you can prevent potential hazards such as chimney fires and harmful air pollutants. Following proper cleaning methods, such as using a wire brush or a commercial cleaner designed for brick surfaces, will not only improve safety but also extend the lifespan of your fireplace. Remember, safety should always be a priority when it comes to maintaining your fireplace, so make sure to follow these steps diligently.