

Are you thinking of installing a wood fence? Don’t look any further! This article will provide tips and instructions. Whether for privacy or decoration, it can be a great investment.
First, evaluate your property and decide why you need the fence. Is it to keep pets and children safe? Or to mark the boundaries? This will help choose the type and height.
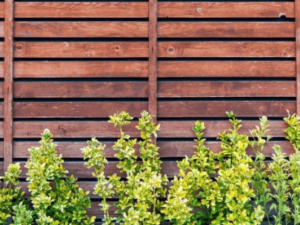
Then, pick a style and design. From classic pickets to modern slats, there are many options for any preference. Also, think about maintenance needs for different wood types. Some might need staining or sealing for longevity.
Before construction, plan. Get permits and check regulations in your area. Also, find any underground utilities before digging post holes. This prevents damage and keeps you safe.
If needed, get help from professionals. Installing a wood fence can be hard work. Experienced contractors can save you hassle and ensure a good result.
The Spruce states that a well-built wood fence can last 20 years or more.
So go ahead! Beautify your surroundings with a sturdy wood fence enclosing your property.
Preparing For The Installation
To prepare for the installation of your wood fence, ensure a smooth process by choosing the right wood and gathering the necessary tools and materials. The sub-sections in this section will focus on the solution for each step, guiding making the right wood selection and ensuring you have all the tools and materials required for the installation.
Choosing The Right Wood For Your Fence
Anna wanted a fence around her garden, so she had to select the perfect wood. She knew it must have 4 qualities: durability, maintenance, aesthetics, and cost. She chose cedar for its strength and beauty.
Years later, her fence is still standing tall. This proves the importance of choosing the right wood.
When selecting your wood, think about these points:
- Durability: Cedar and redwood are great choices as they resist rot and decay.
- Maintenance: Pressure-treated pine needs little maintenance.
- Aesthetics: Choose a color and grain that fits your home and landscape.
- Cost: Decide on a budget and pick a wood that fits it.
Your location matters, too. Get advice from a pro to pick the best wood for you. That way, you get a beautiful fence that lasts!
Gathering The Necessary Tools And Materials
To have a successful installation, here are 5 steps to take:
| 1. Put together a list of items you’ll need. It’ll keep you organized and stop any last-minute hardware store trips. |
| 2. Check your tools for any damaged or missing ones. Replace any tools that aren’t in good condition. |
| 3. Gather materials like screws, nails, brackets, and connectors. Make sure you have enough of each item. |
| 4. Keep all tools and materials in one spot. This will save time when installing. |
| 5. Wear safety gear like gloves and goggles. Safety should be a top priority. |
Apart from getting the tools and materials, it’s crucial to consider measurements, instructions, and any manufacturer requirements for a successful installation.
By following these steps and preparing all the required tools and materials, the installation process will be much smoother. Proper preparation is key to professional results!
Planning The Fence Layout
To plan the layout of your wood fence effectively, you need to address two crucial aspects: measuring and marking the fence line, and determining the position of the posts. While measuring and marking ensures accuracy, determining the position of posts establishes the foundation for a sturdy fence. Let’s dive into these sub-sections and learn how to lay out your wood fence flawlessly.
Measuring And Marking The Fence Line
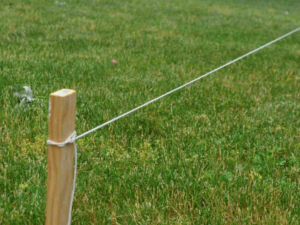
It’s essential to measure and mark the fence line for an accurate layout. Gather a measuring tape, stakes, and string. Locate the corners of your property and use the tape to position the stakes. Measure the distance between each stake, this is the guideline for the fence. Connect the stakes with string or flags to show where the fence will go.
Think about unique factors that may affect the fence layout. Uneven terrain, existing structures, and local regulations need to be taken into account. Doing this will help you make adjustments.
Pay attention to detail when measuring and marking. This will save you time, money, and frustration in the long run. Take your time and double-check the measurements before starting the fence project.
Determining The Position Of Posts
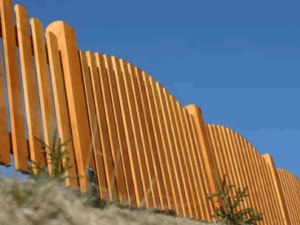
When deciding where to post your fence, consider the terrain. For example: sloping ground and rocky soil. You also need to think about the purpose of the fence – privacy, security, or decoration. Plus, think about the look. Maybe you’d prefer straight lines or a curved design.
And don’t forget local regulations and guidelines. This is important to make sure your fence works and looks good.
Take your time and plan carefully. It’ll help your fence last longer. Don’t forget this step. Your future self will be grateful!
Installing Fence Posts
To ensure a sturdy wood fence installation, tackle the task of installing fence posts. With the sub-sections of digging post holes and setting the posts in concrete, you’ll have a robust foundation for your fence. Start by digging post holes, then move on to setting the posts in concrete for maximum stability.
Digging Post Holes
Measure and mark the spots where you want your fence posts. Use stakes or markers to stay accurate. This will help you plan even spacing.
Time to dig! Grab a post-hole digger or an auger. Clear away vegetation and debris. Position the tool at a marked spot and start digging downwards.
Dig straight and keep the width consistent. Dig deep enough for one-third of the post height. Remove excess dirt.
Check for levelness. Use a carpenter’s level or a string line with a level bubble attached. Make adjustments if needed.
Call local utility companies before digging. Dry soil is harder to dig in. Gravel at the bottom of each hole can help with drainage and stability.
Fence installation has been a part of history. Ancient civilizations and modern times use the age-old technique of digging post holes. Care and precision are key!

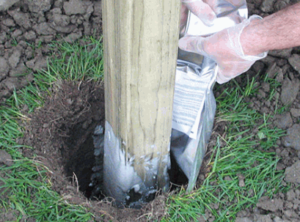
Setting The Posts In Concrete
Set your fence posts in concrete for a sturdy and long-lasting result! Here’s how:
- Mark the posts’ location.
- Dig a hole one-third the length of the post and 10 inches in diameter.
- Place 6 inches of gravel in the bottom for drainage.
- Insert the post, making sure it’s plumb and level.
- Mix the concrete, pour it in, and fill to ground level.
- Let it cure for at least 24 hours before adding panels/rails.
Plus, consider local building codes, weather, and soil type to ensure the best choice of materials & installation method. Did you know? Installing posts in concrete prevents rotting and shifting, says HomeAdvisor.
Attaching Rails And Panels
To properly attach rails and panels to your wood fence, you need a methodical approach. To achieve a sturdy and seamless installation, you’ll need to focus on two key steps: attaching rails to the posts and installing fence panels. Let’s delve deeper into each of these sub-sections and discover the solutions they offer.
Attaching Rails To The Posts
- Choose rails for your project that fit your purpose – material, length, and design.
- Position one rail end against the post then clamp or ask someone to hold it.
- Use outdoor screws or nails to attach the rail to the post. Make sure it’s secure.
- Repeat for each rail – keep spacing consistent.
- Attention to detail is key.
- Pressure-treated lumber can resist decay and insects.
- Weatherproof sealant or paint can protect rails and posts from environmental damage.
For centuries, railings have been used in buildings and structures. Ancient civilizations like the Egyptians used them for both function and beauty. Railings have evolved and today we use innovative and tested methods to create secure, attractive railings.
Installing Fence Panels
- Prep the area. Clear any debris and make sure the ground is level. That’s a solid foundation for your fence panels.
- Measure and mark. Get accurate measurements of the area where you’re installing fence panels. Use stakes and twine to mark the perimeter, with straight lines and equal spacing.
- Dig post holes. Create holes deep enough to securely hold your fence posts. Depth may depend on panel height, but a good rule is one-third of the total height.
- Set the posts. Place posts into the holes and use a level to make sure they’re vertical. Backfill holes with concrete or gravel for added stability.
- Attach rails. Screw or nail horizontal rails across the posts. These will support the fence panels.
- Install panels. Attach fence panels to the rails. Make sure they’re level and secure. Use appropriate fasteners such as screws or brackets.
Also, think about applying a protective coating or treatment to your fence panels. This will improve their durability and resistance to weather conditions.
Did you know that fence panel installation has a fascinating history? It goes back centuries! Ancient civilizations like Egypt and China used wooden fences for protection and boundary marking. They recognized the practicality and aesthetic value of fencing, setting a precedent that continues today.
Adding Finishing Touches
To add those finishing touches to your wood fence, turn to installing a gate and applying stain or paint. These steps will enhance the functionality and aesthetic appeal of your fence. With a gate in place, you can easily access your property while maintaining security. Additionally, choosing the right stain or paint will not only protect your fence from the elements but also give it a polished and personalized look.
Uncover more: How To Install Artificial Grass On Fence
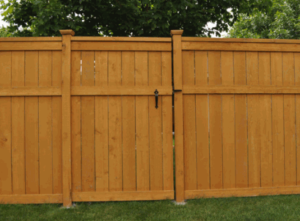
Installing A Gate
Gates are an important part of any fence or enclosure. Here’s how to install one.
Measure the area and mark where the gate will go.
Dig holes for the posts. Make sure they are deep.
Put the posts in the holes and fill them up with concrete.
Attach the gate with hinges. Make sure it opens and closes easily.
Think about what type of gate best fits your needs. A swing gate or a sliding gate?
When installing a gate, precision is key. You need to plan and execute it well to get the desired result – whether it be practicality or looks.
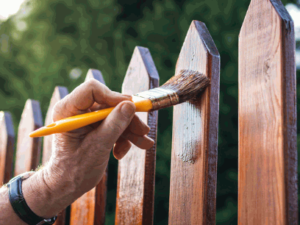
Applying Stain Or Paint
Time for the finishing touches. Applying stain or paint adds color and protection.
- Cover the surface around your project with a drop cloth. Make sure the area is well-ventilated.
- Sand the surface for a smooth & even base. Sandpaper should be used and work in the direction of the wood grain.
- Apply a primer. It will increase the adhesion and coverage of the stain/paint. Let it dry before moving on.
- The stain or paint can be applied using a brush, roller, or sprayer. Do thin layers and let each coat dry before the next one. Take your time with this step for great results.
Conclusion
To finish, setting up a wooden fence needs careful preparation and work. By following the steps in this article, you can ensure a successful installation that improves both the look and usefulness of your home.
Also, there are other things to think about. Selecting the correct type of wood is critical. Pick a strong and weather-proof choice such as cedar or redwood to make it last. Additionally, a defensive coating can upgrade its toughness, keeping rot and insect harm away.
Furthermore, normal maintenance is necessary to guard your wooden fence’s looks and quality. Examining it now and then for any harm or deterioration will let you deal with problems before they get worse. Doing simple tasks like washing with gentle soap and water can keep your fence looking new for years.
In addition to these tips, it’s worth investing in good gate hardware. A well-made gate adds convenience and security. Install self-closing hinges and a dependable latch mechanism to give safety while making sure of easy access.
By obeying these guidelines and putting time into quality materials and proper maintenance, your wooden fence will not only provide its purpose but also boost the general ambiance and value of your property. Enjoy the natural beauty of a wooden fence while taking pleasure in the privacy and safety it brings.