

Keeping your plastering tools clean is crucial for maintaining their lifespan, preventing contamination of materials, and ensuring the quality of your work.
We will discuss why cleaning plastering tools is important and provide a step-by-step guide on how to clean tools such as trowels, hawks, floats, brushes, and buckets.
From removing excess plaster to drying and storing tools properly, we will cover all the tips you need to keep your tools in top condition.
Why Is It Important To Clean Plastering Tools?
Keeping plastering tools clean is essential for maintaining their quality and prolonging their lifespan. Regular cleaning and maintenance ensure that the tools remain rustproof and efficient, allowing for optimal performance during plasterwork.
When plastering tools are not cleaned regularly, debris and residue can accumulate, affecting the quality of the finish and potentially causing defects in the plastered surface. Dirt and grime can lead to rust formation, which not only compromises the tools’ integrity but also impacts their functionality. By cleaning tools diligently after each use and storing them properly, one can significantly extend their durability and efficiency, ultimately saving money on replacements and enhancing the overall effectiveness of the plastering process.
Uncover more: What Type Of Plaster Is Used For Bathrooms
Prolongs The Lifespan Of Tools
Regular cleaning of plastering tools not only ensures their immediate functionality but also plays a crucial role in extending their lifespan. By preventing rust and maintaining their quality through proper cleaning practices, professional plasterers can rely on these tools for long-term use.
Clean tools are less prone to rust, which can be a destructive force, leading to corrosion and weakening of the tools over time. For professional plasterers, whose work often involves handling damp materials, rust prevention is imperative. Simple cleaning routines, such as wiping down tools with a dry cloth after use or occasionally applying a thin coat of lubricant, can make a significant difference.
Regular maintenance not only ensures the tools’ functionality but also impacts the overall quality of work. Clean tools deliver smoother finishes and better results, enhancing the professional image and reputation of the plasterer. By prioritizing cleanliness, plasterers can distinguish themselves in their craft and provide superior services to clients.
Prevents Contamination Of Materials
Cleaning plastering tools is a critical step in preventing contamination of materials used in plasterwork. Maintaining rustproof tools ensures that the construction site remains free from any potential material impurities or debris that could affect the quality of the plastering work.
Contaminated tools can lead to subpar results and compromise the structural integrity of the project. Regular cleaning practices are essential to uphold high standards of construction site hygiene, preventing the spread of contaminants that can undermine the durability and appearance of the plastered surfaces. By investing time in maintaining rustproof tools, construction professionals prioritize the longevity and effectiveness of their tools, ultimately enhancing the overall efficiency and success of their plasterwork projects.
Maintains Quality Of Work
Clean tools are essential for ensuring the quality of plasterwork performed by professional plasterers. By maintaining clean and rustproof tools, plasterers can deliver efficient and precise results, showcasing their expertise and attention to detail in every project.
When tools are well-maintained, they not only enhance the efficiency of plastering tasks but also contribute to the overall professionalism of the craftsman. Quality tools ensure that the plaster is applied smoothly and evenly, minimizing the need for corrections. Clean tools reduce the risk of imperfections and defects in the final finish, leading to overall customer satisfaction.
A professional plasterer who values the importance of using clean tools sets a high standard for their work. This dedication to cleanliness reflects a commitment to delivering top-notch results and maintaining a strong reputation within the industry.
What Tools Need To Be Cleaned?
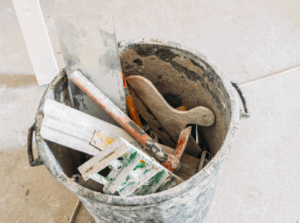
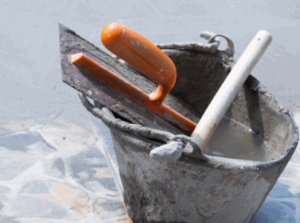
Several essential plastering tools require regular cleaning to maintain their performance and longevity. Tools such as trowels, hawks, floats, brushes, and buckets should be cleaned thoroughly after each use to ensure optimal functionality and efficiency.
Regarding cleaning trowels, removing any dried plaster is crucial to prevent uneven application in the future. Simple steps like soaking the trowel in warm soapy water and scrubbing off residue can make a significant difference in the tool’s usability.
For hawks, ensuring that the surface is completely free from any dried material is essential to prevent contamination in the fresh plaster mix. A quick wipe-down with a damp cloth after use can prevent residue buildup and maintain a smooth working surface.
Floats also require attention to detail in cleaning to avoid the transfer of unwanted debris onto the walls. Regularly washing and drying the float can prevent imperfections in the finished plasterwork.
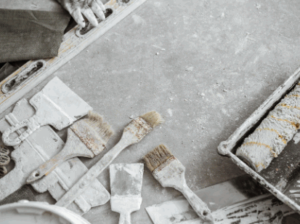
It’s essential to keep brushes clean to avoid leaving unwanted marks on the plastered surface. Thoroughly rinsing the brush with warm water and mild soap can prevent hardened plaster from affecting its bristles, ensuring a clean finish.
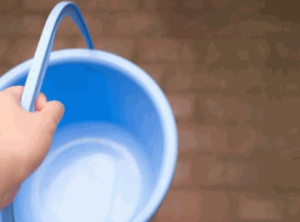
Buckets used for mixing plaster need to be thoroughly cleaned to prevent residue from contaminating future mixes. Soaking the bucket and scrubbing off any remaining plaster can maintain the quality of the plasterwork and prevent inconsistencies in texture.
Following these proper cleaning techniques for each tool, not only extends their lifespan but also ensures that your plastering jobs are completed to the highest standard, with clean finishes and professional results.
Trowels
Cleaning trowels is crucial for professional plasterers as these tools play a key role in achieving smooth and even finishes. By keeping trowels clean, plasterers can ensure that their work is of high quality and meets the desired standards of craftsmanship.
Dirty trowels can leave unwanted streaks and imperfections on the plastered surface, compromising the overall look and durability of the finish. Regularly cleaning and caring for trowels not only enhances the aesthetic appeal of the plasterwork but also helps in extending the lifespan of the tools themselves.
One of the best practices for trowel maintenance is to wash them thoroughly with warm water after each use, removing any dried plaster or residue that could affect future applications. Storing trowels in a dry place and ensuring they are oil-free can prevent rust and prolong their usability.

Hawks
Cleaning hawks is essential to prevent cross-contamination between different plaster mixes and ensure consistent application. Professional plasterers rely on clean hawks to maintain efficiency and precision in their work, making regular cleaning a fundamental aspect of tool maintenance.
When plastering, the hawk acts as a portable platform for holding the plaster, allowing for easy access during application. Ensuring that hawks are clean not only avoids unwanted mixtures but also promotes a smooth and even spread of plaster. Proper cleaning techniques involve scrubbing off dried plaster, washing with warm soapy water, and thorough drying to prevent mold growth. Storing hawks in a dry area away from moisture and dust is crucial to maintain their integrity and prolong their lifespan. By prioritizing the cleanliness of hawks, plasterers can achieve seamless and consistent results in their projects.
Floats
Floats require regular cleaning to maintain their smooth surface and prevent material buildup that can affect the final finish. Professional plasterers prioritize the cleanliness of floats to ensure seamless and high-quality results in their plasterwork projects.
Keeping floats clean is essential not only for the appearance of the final plastered surface but also for the overall durability and integrity of the finish. A clean float contributes to achieving a uniform texture and a flawless look in the plasterwork. The presence of debris or hardened material on a float can lead to unevenness in the application of plaster, resulting in a patchy or non-uniform finish.

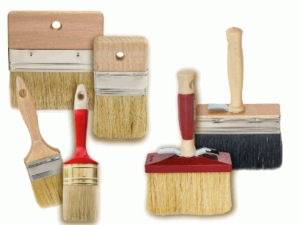
Brushes
Clean brushes are essential for achieving precise detailing and texture in plasterwork. Professional plasterers rely on them to add finesse and intricacy to their projects, making regular cleaning a standard practice in their tool maintenance routine.
This meticulous cleaning regimen not only ensures that the brush bristles remain free from hardened plaster residue but also prevents any cross-contamination between different plaster types, preserving the integrity of the finishes.
When brushes are kept immaculately clean, they contribute significantly to the overall aesthetic appeal of the plastered surfaces, allowing for smooth application and uniform texture distribution.
Effective cleaning techniques involve soaking the brushes in warm soapy water, followed by gentle scrubbing to dislodge any stubborn debris, and thorough rinsing in clean water to remove all traces of soap.
Buckets
Clean buckets are essential for ensuring the purity of plaster mixes and preventing contamination during the application process. Professional plasterers prioritize the cleanliness of buckets to maintain the quality and integrity of their plasterwork, making regular cleaning a non-negotiable aspect of their tool care routine.
When buckets are dirty or contaminated, impurities can easily transfer to the plaster mix, leading to defects in the final finish and compromising the structural strength of the plaster. Proper cleaning methods involve rinsing buckets immediately after use with clean water, scrubbing off any residue or dry plaster, and ensuring thorough drying before storage to prevent mold growth and bacterial contamination.
Storing buckets in a clean, dry area away from direct sunlight and moisture is crucial to maintain their cleanliness and prolong their usability. By investing time and effort into maintaining clean buckets, plasterers can uphold the highest standards in their plasterwork projects, ensuring impeccable results every time.
How To Clean Plastering Tools?
Cleaning plastering tools effectively involves a systematic approach that includes removing excess plaster, soaking in warm water, scrubbing with a brush, using vinegar or lemon juice for stubborn stains, and ensuring proper drying and storage. Professional plasterers often utilize wash stations and rust protectants to maintain the cleanliness and longevity of their tools.
After the initial steps of scrubbing and soaking, it’s crucial to thoroughly rinse the tools to remove any remaining residue.
Once cleaned, allow the tools to air dry completely before storing them in a dry place. Utilizing rust protectants like WD-40 or storing tools in a container with a dehumidifier can help prevent rust formation.
Creating a routine maintenance schedule for cleaning tools will not only prolong their lifespan but also ensure optimal performance during plastering projects.
Remember, clean tools are not only efficient but also essential for producing high-quality finishes.
Removing Excess Plaster
The first step in cleaning plastering tools involves removing excess plaster and joint compound residues to prevent buildup and maintain tool integrity. Using water and appropriate cleaning agents, professional plasterers ensure that their tools are free from excess material before proceeding with further cleaning steps.
One crucial aspect of this initial cleaning process is to scrape off any dried or hardened plaster using a putty knife or scraper. Removing these stubborn residues is essential to avoid clogging up the tools and affecting their performance during the next use. A thorough cleaning ensures that each tool’s surface is clean and ready for the next task, promoting efficiency and extending the lifespan of the equipment.
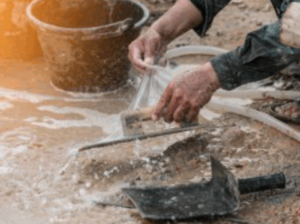
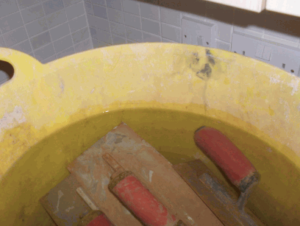
Soaking In Warm Water
Soaking plastering tools in warm water is an effective method to loosen dried plaster and facilitate the cleaning process. Professional plasterers often use rust protectants in the water to prevent oxidation and maintain the tools’ condition during soaking.
Warm water helps break down the hardened plaster, making it easier to remove, especially in intricate tool crevices. The use of rust protectants not only safeguards the tools from corrosion but also boosts their longevity. To maximize the benefits, experts recommend soaking tools for at least 30 minutes, enabling the water to penetrate and soften stubborn residues. Adding a mild detergent can enhance the cleaning process, leaving the tools spotless and ready for future use.
Scrubbing With A Brush
Scrubbing plastering tools with a brush is crucial for removing stubborn residues and ensuring thorough cleanliness. Professional plasterers often utilize dedicated wash stations equipped with brushes and cleaning agents to efficiently scrub their tools and maintain their pristine condition.
By scrubbing off the dried-on plaster, dirt, and grime, plastering tools are not only cleaned but also preserved for prolonged use. The process involves using specific brushes designed to remove different types of residues effectively. Dedicated wash stations offer a controlled environment for cleaning, preventing cross-contamination, and ensuring optimal hygiene during the scrubbing process. This meticulous cleaning routine not only enhances the longevity of the tools but also contributes to the overall efficiency of the plastering work.
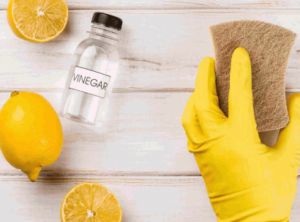
Using Vinegar Or Lemon Juice For Stubborn Stains
For stubborn stains on plastering tools, professional plasterers often turn to natural solutions such as vinegar or lemon juice. These acidic agents help break down tough residues and stains, ensuring that the tools are thoroughly cleaned and ready for use in subsequent plasterwork.
These eco-friendly solutions offer a safe and effective alternative to chemical cleaners, reducing exposure to harmful substances while being gentle on the environment. The acidity of vinegar and lemon juice makes them ideal for dissolving mineral deposits, rust, and grime that can accumulate on tools over time.
- When using vinegar, it’s recommended to dilute it with water to prevent any damage to the tool’s surface.
- Lemon juice can be applied directly to the stain or mixed with baking soda to create a powerful scrubbing paste.
Regularly cleaning your tools with these natural agents not only helps extend their lifespan but also ensures optimal performance during each plastering job.
Drying And Storing Tools Properly
After cleaning, it is essential to dry plastering tools thoroughly before storing them in a dry environment. Professional plasterers prioritize proper tool storage to prevent rust and maintain the tools’ cleanliness and efficiency for future plasterwork projects.
Effective drying techniques include wiping the tools with a clean cloth to remove excess moisture and then air drying them in a well-ventilated area. Ensuring that all nooks and crannies are dry is vital to prevent rust formation. Storing tools in a toolbox with silica gel packets can help absorb any residual moisture. Placing tools on racks or hooks rather than in piles can also aid in proper airflow for complete drying.
Tips For Maintaining Clean Plastering Tools
To ensure the longevity and efficiency of plastering tools, professional plasterers should follow some essential tips for maintaining cleanliness. These include using rust protectants, utilizing wash stations for regular cleaning, and promoting water efficiency to conserve resources during tool maintenance.
Implementing rust protectants not only inhibits corrosion on metal tools but also extends their usability, saving costs on frequent replacements. Wash stations serve as convenient spots for quick cleanups, preventing plaster buildup that can affect tool performance. By embracing water-efficient cleaning practices, professionals reduce their environmental impact, contributing to sustainable construction practices.